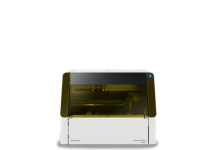
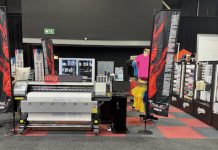
Laser machines enable you to customise almost any product. With a CO2 laser machine such as the versatile SA Argus 1060, you can cut and engrave a wide range of materials that include: paper, wood, plastics, textiles and acrylics as well as engrave on metal, glass and ceramics. This opens up a world of endless business opportunities.
For this demonstration, a basic trophy design was chosen. Using the design, you can incorporate any company branding and make it your own. As the design has already been tested and is laser cut-ready, it is opened in CorelDraw and then transferred to the machine via a USB stick. Each laser machine will have different settings.
To make the design stand out, SA Argus decided to combine various laser materials such as wood in a walnut veneer, an engraving panel in brushed gold, coloured melamine MDF board, black Perspex® and just to add some bling, mirror acrylic in bright red. You can use any material that is suitable for lasers.
Veneer wood is the perfect way to elevate the look of almost any laser cut project. It is available in a wide variety of finishes. Walnut works well as it engraves well and is easy to work with. It can also be finished off with varnish to bring out the tones and grains of the veneer.
An engraving panel is ideal for trophies, name badges, indoor signage and a range of other applications. It is made up of a two toned, double layer plastic that eliminates secondary processes such as paint filling as you simply engrave away the top layer. It is also available in a wide range of colours and finishes such as brushed silver that resembles metal. As you cannot cut metal with a CO2 laser machine, this is a great alternative.
Melamine is easy to laser cut and to clean afterwards, you simply wipe with a wet cloth. Black acrylic is great for indoor and outdoor applications and also perfect for laser cutting and engraving. To achieve fine detailed engraving, you really need precisely aligned high quality optics. A stable laser source with a quick rise time is equally important to ensure crisp edges when engraving.
Just as tyres are important to keep a race car going straight at high speeds and on the road around tight corners, so is an accurate and robust motion system to take the laser where it needs to be to produce high quality engraving, consistently and reliably.
Steps summary:
• Transfer designs to the machine from CorelDraw, using a USB. Although predetermined settings are available for the various materials, these can easily be adjusted, depending on project and operator requirements.
• As a standard rule, the lid will always be closed on a laser machine during a job.
• Direct the laser head onto the material and position it to the ‘start point’.
• Because materials do have inconsistencies, always check that you have focused your laser before cutting.
• Scoring can be used as a basic guideline if you have more than one element on a template.
• After cutting the wood, switch off the exhaust, air assist and laser, then remove the wood design.
• Add the engraving panel and engrave.
• The next item is melamine.
• The next item is mirror acrylic. Peel off the plastic sheeting after the job. Cut and engrave on the back.
• Finally, cut the acrylic. Peel off the plastic coating once you’ve finished cutting.
• Spray with a cleaning agent and wipe down.
• It is important to have the right adhesives when assembling the materials.
Laser cut templates are available from www.laser-templates.com and materials from www.lasersupplies.co.za
To submit your news please, contact journo@practicalpublishing.co.za
Submit your news and video content to journo@practicalpublishing.co.za
Subscribe to our YouTube channel, read the top 5 stories weekly on WhatsApp or sign up to our newsletter.
SA Argus Laser Machines
(+27 11) 466 6612
sales@sa-argus.co.za
www.sa-argus.co.za


