One of the biggest problems in a screen printing facility is the lack of an integrated registration system that starts with a template in the art department and works through the screen and production departments. Many have a registration system from the screen room and on, but not starting in the art department. There are several reasons for introducing an integrated system, including: speeding up production, reducing down time and catching mistakes.
Please refer to the images above the article that correspond to the headings of each section below.
[Image 1]
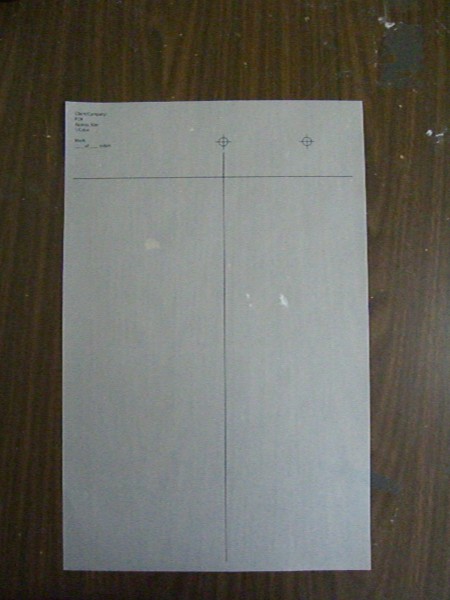
Start in the art department by making a template with three registration marks. Put one at the top that is centered and another one off to the right about 7.6cm to 10.2cm (three to four inches). These two registration marks never move and are used on every piece of artwork created. The third registration mark will bisect the centre line.
[Image 2]
Put a guide through the centre and one more below the top registration marks. This is the top of your design line and represents where the top of a full front print would start. These will only be guide lines when you actually use the template, but to make our system, make these lines black and print out one sheet for the screen department and one for each press.
[Image 3]
In the screen room, using a sheet of Melamine that has been cut down, mount it to the wall and add a 5.1cm x 5.1cm (2'' x 2'') to the bottom and the side. This will be used to guide your screen to a fixed location. Measuring from the bottom up and the side in, determine where you want the top of your design to locate on your largest standard screen. Make your mark and mount one of the printed out sheets with the template on it to that area.
[Image 4]
Using a screen that has been coated, slip it on to the registration system so the emulsion is touching the template and the frame is locked into the corner touching the 5.1cm x 5.1cm (2'' x 2''s). Trace the registration marks on to the screen using a ball point pen making sure not to cut the mesh with the pen. Take the screen from the wall position, turn it over and mount the artwork that you will be exposing to the screen with tape. Repeat this process for all the screens for that job. Since all screens will need to have the registration marks in the same place for all jobs, it is feasible to make up screens prior to artwork being created. When the artwork goes to the screen room, it is placed on the screens and then the screens are exposed. Expose, washout, tape and block out the screen and take them to the press.
[Image 5]
Using a (4.8mm-6.4mm) 3/16”-1/4” sheet of white PVC, cut to the exact size of the pallet on your press and mount another sheet with the template to be used as a line-up board. Mount it so you can load a garment on a pallet and have the image fall exactly where you want it on the garment. In the photo above, we mounted the template sheet to a piece of cardboard to be used as a temporary line up-board.
[Image 6]
Spray your pallet and mount your line-up board on it.
[Image 7]
Put your screens into your press and register them to the line-up board. Because of the thickness of the line-up board, your screen should be touching the line-up board and you shouldn’t need to press down on the screen to see if you are in registration.
Once you feel you’re lined up, add ink to the screen and print the screen that has the most information and will let you know if you’re in register or not. Using clear tape or a sheet of clear polyester, tape over the entire image.
[Image 8]
Print the next colour to see if it is in registration. If it is, wipe the ink off of the clear tape and go on to the next screen. If it isn’t, wipe off the tape, micro the screen and check it for registration. Do this until all screens are registered.
[Image 9]
The print shown is not in register, so the tape was wiped clean with a dry rag and the screen was reregistered until perfect.
[Image 10]
When all screens are in register, remove the line-up board and print the job.
[Image 11]
Do this for every job, whether it’s one colour or multicolour.
This article was published in the Practical Sign & Digital Graphics Magazine: www.signafrica.com/magazine.


